
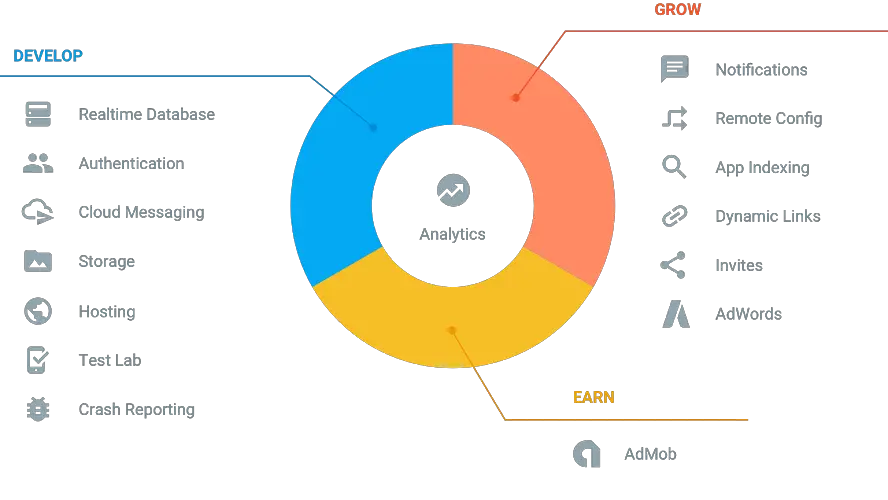
Firebase is a mobile development platform built by the Google to help the developers quickly develop high-quality apps, grow the user base, and earn extra cash by displaying ads.
Firebase comes with everything that mobile developers need to build, maintain and scale a mobile app on all platforms including iOS: from Storage, Hosting and Databases to innovative tools like Remote Config and Test Lab.
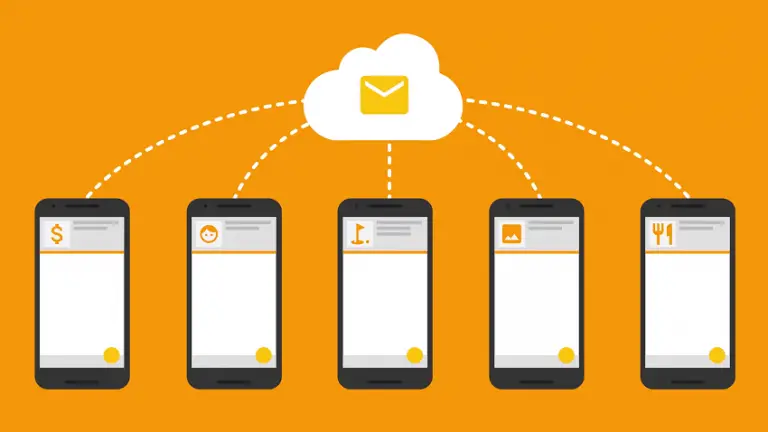
Firebase Cloud Messaging (FCM) platform is another important service based on the precedent Google Cloud Messaing (GCM) service. FCM inherits core infrastructure of GCM but simplifies the client development. FCM integration can be completed with just lines of code instead of writing own registration or subscription retry complex logic as you did for GCM.
In first part of this tutorial, we’re going to explore how you can integrate Firebase Cloud Messaging (FCM) in your Android app and how to migrate from GCM to FCM. Let’s start with very basic step.
Prerequisites
- A device running Android 2.3 (Gingerbread) or newer, and Google Play services 9.0.2 or newer
- The Google Play services SDK from the Android SDK Manager
- Android Studio 1.5 or higher
- An Android Studio project and its package name
Add Firebase to Your Android Project
You can add Firebase into your Android project in following steps:
- You will need to create a Firebase project in the Firebase console, if you don’t already have one. If you already have an existing Google project associated with your mobile app, click Import Google Project. Otherwise, click Create New Project.
- Click Add Firebase to your Android app and follow the setup steps. If you’re importing an existing Google project, this may happen automatically and you can just download the config file.
- When prompted, enter your app’s package name. It’s important to enter the package name your app is using; this can only be set when you add an app to your Firebase project.
- At the end, you’ll download a
google-services.jsonfile. You can download this file again at any time. - If you haven’t done so already, copy this into your project’s module folder, typically
app/.
Setup FCM SDK in Your Project
First of all, you should add rules at your root level build.gradle file for google services plugin:
buildscript {
 repositories {
 jcenter()
 }
 dependencies {
 classpath 'com.android.tools.build:gradle:2.1.0' //you should specify your custom gradle version
 classpath 'com.google.gms:google-services:3.0.0'

 // NOTE: Do not place your application dependencies here; they belong
 // in the individual module build.gradle files in app/ folder
 }
}
In your app/build.gradle file, add the following dependencies and apply plugin line at bottom:
apply plugin: 'com.android.application'

android {
     //...........
    }
dependencies {
    compile fileTree(include: ['*.jar'], dir: 'libs')
    //.................. Other depedencies

    compile 'com.google.android.gms:play-services:9.0.0''    // You can update to newer versions
    compile 'com.google.firebase:firebase-messaging:9.0.0'
}
apply plugin: 'com.google.gms.google-services'  // Add this at the bottom for FCM
You must use Play Services version 9.0.0 or higher for Firebase & Google Ads services to work properly:
compile 'com.google.android.gms:play-services-appindexing:9.0.0'
compile 'com.google.android.gms:play-services-ads:9.0.0'
Now edit your app manifest to incorporate Firebase services:
<?xml version="1.0" encoding="utf-8"?>
<manifest xmlns:android="http://schemas.android.com/apk/res/android"
 package="com.test.fcm"> // Specify you package

 <uses-sdk
 android:minSdkVersion="15"
 <!-- If FCM is critical to the Android app's function, be sure to set android:minSdkVersion="8" or higher in the manifest.
 This ensures that the Android app cannot be installed in an environment in which it could not run properly. -->
 android:targetSdkVersion="17" />
 <!-- you will need to add Internet permission -->
 <uses-permission android:name="android.permission.INTERNET" />

 <application

 //........
 <activity
 //..........
 </activity>
 <service
 android:name=".FirebaseMessagingService.MyFirebaseMessagingService">
 <intent-filter>
 <action android:name="com.google.firebase.MESSAGING_EVENT"/>
 </intent-filter>
 </service>

 <service
 android:name=".FirebaseMessagingService.MyFirebaseInstanceIDService">
 <intent-filter>
 <action android:name="com.google.firebase.INSTANCE_ID_EVENT"/>
 </intent-filter>
 </service>
 </application>
</manifest>
In manifest file, we’ve registered following two services:
- MyFirebaseMessaginigService (click to view) A service that extends
FirebaseMessagingService. This is required if you want to do any message handling beyond receiving notifications on apps in the background. - MyFirebaseInstantIDService (click to view) A service that extends
FirebaseInstanceIdServiceto handle the creation, rotation, and updating of registration tokens. This is required for sending to specific devices or for creating device groups.
Access Device Registration Token
On initial startup of your app, the FCM SDK generates a registration token for the client app instance. If you want to target single devices or create device groups, you’ll need to access this token.
You can access the token’s value by extending FirebaseInstanceIdService e.g. MyFirebaseInstantIDService (click to download) .Make sure you have added the service to your manifest, then call getToken in the context of onTokenRefresh, and log the value as shown:
You do not need to start service from anywhere, just need to add in manifest, Once service is registered you can get token using FirebaseInstanceId.getInstance().getToken() anywhere in you project.
@Override
 public void onTokenRefresh() {

 //Getting registration token
 String refreshedToken = FirebaseInstanceId.getInstance().getToken();

 Log.d(TAG, "Refreshed token: " + refreshedToken);
 if(refreshedToken != null && !refreshedToken.equals("")){

 sendRegistrationToServer(refreshedToken);

   }
}
You’re done! Once the client app is set up, you are ready to start sending downstream messages with the Firebase console and sending topic messages with Firebase console provided by Google.
Continue Reading:
- FCM Push Notifications: Java Server Side Integration
- FCM Push Notifications: PHP Server Side Integration
- FCM Push Notifications: Receive Messages in an Andriod App
Need further help? If you’re confused or facing any issue while completing first step, let’s know in comments.

cloroquina 250 mg https://chloroquineorigin.com/ chloroquine side effects
buy cialis online prescription
This design is wicked! You obviously know how to keep a reader entertained. Between your wit and your videos, I was almost moved to start my own blog (well, almost…HaHa!) Fantastic job. I really enjoyed what you had to say, and more than that, how you presented it. Too cool!
albuterol inhaler pregnancy buy albuterol tablets australia how many puffs in ventolin inhaler what does ventolin do
tadalafil generic where to buy tadalafil drug
Hey there! I just want to offer you a huge thumbs up for the excellent info you have got right here on this post. I’ll be returning to your site for more soon.
cialis tadalafil tadalafil cost walmart
buy tadalafil from india
tadalafil price walmart tadalafil without a doctor prescription
erectafil 2.5
buy cialis pills https://cialistrxy.com/
Your point of view caught my eye and was very interesting. Thanks. I have a question for you. https://accounts.binance.com/zh-TC/register?ref=V2H9AFPY
I don’t think the title of your article matches the content lol. Just kidding, mainly because I had some doubts after reading the article.
Your point of view caught my eye and was very interesting. Thanks. I have a question for you.